Wednesday, August 19, 2009
Fantastic Voyage Step #7
All Right Garden!!!
- Time
- Not watering -- thanks Wendy!
- Heat - finally we have had a few sunny, hot days in a row
I did a lot of research on how to turn your green tomatoes into red ones. One of the basic tips was to only water every 2-3 days. I've been watering every single day. I didn't know they only needed water every 2-3 days, even in the heat of summer. So, I stopped watering this week. I haven't given them any water since Saturday, and we seem to be doing much better now. I'll probably throw on a little water today, but not too much.
If you're struggling like I am -- I live in fear of all those 200 tomatoes dying in the soon-to-come frost, there are additional ways to turn your tomatoes if that frost is headed your way. I've gathered a few from the Internet here. Now, I haven't tried these yet myself, but if we get closer to the first frost and I still have bunches on the vine, you can bet I'll start trying different things to save them!
- The ol' brown paper bag trick -- apparently this works on tomatoes as well as peaches
- Place them a box, in the dark, with an apple. The apple apparently provides the necessary chemicals in the air to turn them red. Who knew?
- Pick them and just let them sit on your counter out of direct sunlight until turning red.
Monday, August 17, 2009
Canned Salsa
3 qt. tomatoes, peeled and coarsely chopped
1 qt. onions, coarsely chopped
1 c. green peppers, coarsely chopped
4-6 jalapeno peppers, seeded and finely chopped
4-6 cloves garlic
1-2 tsp. salt
1/2 bunch of cilantro
1/2 c. sugar
3/4 c. 5% apple cider vinegar
Cook down to 1/2 volume. Put into sterilized jars; seal and water bath 20 minutes for pints or pressure at 5 pounds for 5 minutes.
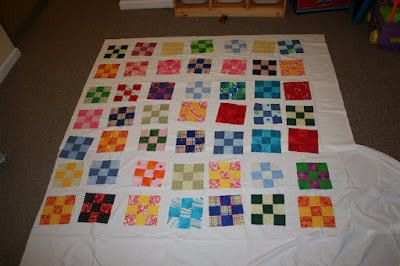
Summer Quilt-a-long progress
Tuesday, August 11, 2009
Toy Management
Until two weeks ago, the toys were all over the place. I've been dreaming of these toy organizers from IKEA for years. This summer, the dream became reality. YEAH!!!! I love them! The kids are actually playing with the toys and then they clean them up every night before going to bed. It's amazing! My 20-month-old will clean up his own toys and knows that the bin needs to be put away before the job is finished. I'm in Mommy Heaven!
I've been thinking about how I could make the bins even cuter than they are, and here's what I've done -- I designed labels for each of them. There's both pictures and words so that kids of varying ages will know what's available and how to clean it up when they're finished using something.
I have a few bins left to finish, but I've run out of steam for a bit. I'll come back to it in a couple of weeks and finish the rest.
To the Food Growers of America

Yahoo!!!
This morning, I was missing my beloved EQ5 as I worked on my new computer. For my birthday this past year, I saved all my pennies and bought this great new laptop which I love, love, love! But, it is Vista, and I didn't think that EQ5 would work on Vista.Monday, August 10, 2009
Fantastic Voyage Step #6
I love getting to the part where it all starts to come together!Fantastic Voyage Step #5
You are going to sew two of your small blocks together in opposite directions. If you look at the picture above, you can see that the large pieces to the side end up on opposite ends from one another. This is what helps to give it such a scrappy look.
For this step, again you need to make sure that all the blocks look the same when you finish sewing them. The easiest way to do this is to set them into a stack, all facing the same way. When you pick up two to sew together, turn one so that it is in the opposite direction and then sew. Again, I used chain sewing to make this go really fast. After sewing the two halves together, iron and lightly starch them. It will make every step after a bit easier.
You should end up with 64 blocks -- our final number!
This step took about an hour.
Thursday, August 6, 2009
Fantastic Voyage Step #4
Iron and open.
I'm realizing that I may not have enough pictures for visualization. If someone actually reading this would like more detailed pictures, let me know.
Fantastic Voyage Step #3
Step #3 is also fairly easy. There's only one trick -- sew everything on the same side. Lay out your pieces from step #2. Next to them, place your stack of Piece C fabric. You're going to sew Piece C to the long side of your two pieces with the right sides together. It will make three parallel seams.
If you don't sew all the pieces on the same side, the next step in the quilt will not work properly. So use caution!
Iron open and starch. When finished, you should have 128 building blocks for your quilt that have three strips of fabric in each.
Wednesday, August 5, 2009
Fantastic Voyage Step #2

Fried Green Tomatoes
I don't know what that traditional southern way of making fried green tomatoes is supposed to be, so I just made up my own way.
Fantastic Voyage Step #1
- 1.5 inches wide by 4.5 inches long
- you will need 256 of these pieces
- Pre-cut fabrics -- cut seven Piece A sized strips from each of the 40 fabrics included
- Half-yard method -- cut three strips that are 1.5 inches wide from each of the twelve fabrics. Then cut those at 4.5 inch intervals. You will need eight Piece A to be cut from each 1.5 inch strip
Piece B --
- 1.5 inches wide by 8.5 inches long
- You will need 128 of these pieces
- Pre-cut fabrics -- cut four Piece B sized strips from the second package of honey bun fabrics, making sure to use each of the fabrics included
- Half-yard method -- cut two 1.5 inch wide strips from each fabric. Select two fabrics and cut an additional 1.5 inch strip from each. Then cut all of the 1.5 inch strips into pieces that are 8.5 inch long strips. You should get five Piece B's from each 1.5 inch strip
- 2.5 inches wide by 4.5 inches long
- You will need 256 of these pieces
- Pre-cut fabrics -- cut seven Piece C sized strips from each of the 40 fabrics included in the Jelly Roll package
- Half-yard method -- cut three strips that are 2.5 inches wide from each of the twelve fabrics. Then cut those at 4.5 inch intervals. You will need eight Piece C to be cut from each 2.5 inch strip
Phew! That's quite a bit of cutting. I believe the cutting took me about 2.5 hours to finish.
Molten Chocolate Lava Cake
As is always the case, I found a better recipe just before making it and decided to try it instead. Thanks to the Pioneer Woman, it was a huge success. We loved it so much we made it again later in the week. I've tripled the Pioneer Woman's recipe. We baked it in a 9 x 13 pan and just scooped it out and served it with ice cream.
It probably would have been cooler in individual cups, but I don't have twelve of them.
Molten Chocolate Cake -- Pioneer Woman
12 oz Semi-sweet chocolate chips
1 1/2 cup butter
3 cups Powdered Sugar
6 whole Eggs
6 whole Egg Yolks
1 cup, 1 ounce Flour
1. Preheat oven to 425 degrees.
2. Spray 12custard cups (or a 9 x 13) with Pam and place on cookie sheet.
3. Microwave chocolate and butter in large bowl on high for about 1 minute, until butter is melted. whisk until chocolate is also melted.
4. Stir in sugar until well blended. Whisk in eggs and egg yolks. Stir in flour.
5. Divide between cups.
6. Bake 13-14 minutes until sides are firm and center is soft. Let stand 1 minute.
If using a 9 x 13, bake about 2 minutes longer -- 16 minutes should do it.